Calendar & bookings
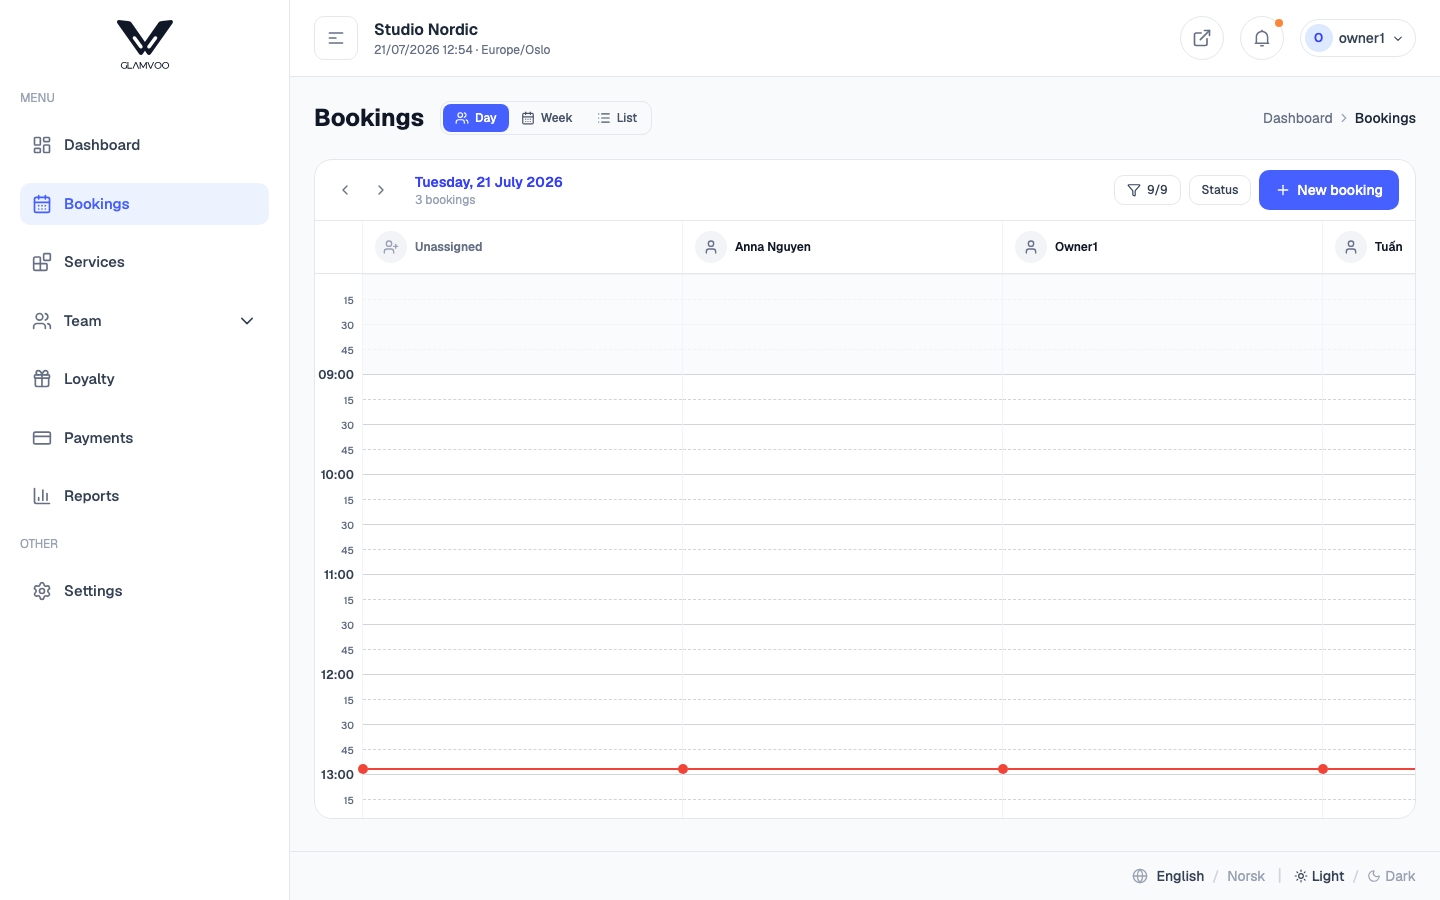
The calendar is where you'll spend most of your day. It shows your appointments laid out by time, with a column for each team member, so you can see who's doing what and where the gaps are.
Reading the calendar
- Each column is a team member; each block is a booking, positioned by its time and coloured by its status.
- There's always an Unassigned column for bookings that don't have a team member yet (for example, a customer who booked "any available"). See Walk-ins & self-pick.
- Move between days with the date controls at the top.
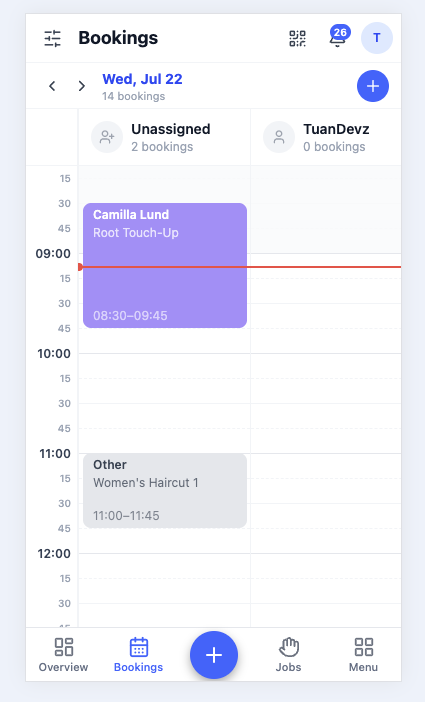
On a phone, the calendar becomes a single scrollable day so it stays readable.
Create a booking
- Select New booking (the + button).
- Choose the customer — search for an existing one, or add a new customer on the spot. For someone with no appointment, use Walk-in.
- Add one or more services. Each service can have its own team member and time, so a customer can move from one person to another during the visit.
- Confirm the date and time.
- Save.
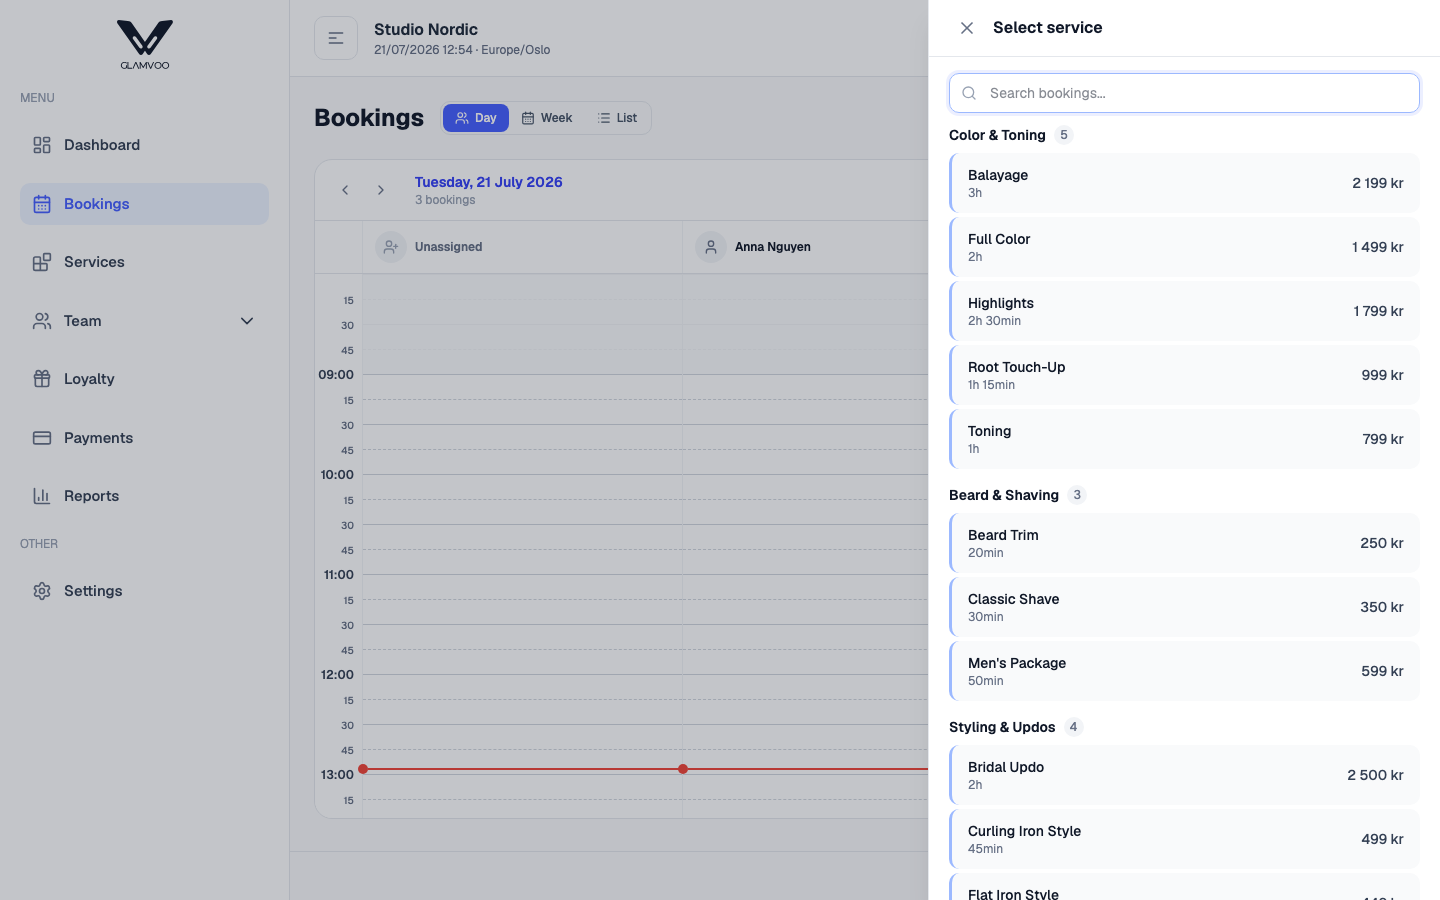
The system checks for clashes as you go, so you don't accidentally double-book the same person.
Got a loyalty voucher? Once you've chosen the customer and their services, enter the voucher code in the booking form — the total updates before you save. See Loyalty, stamp cards & vouchers.
Open, edit or cancel a booking
Select any booking to open its details — customer, services, times, status and payment.
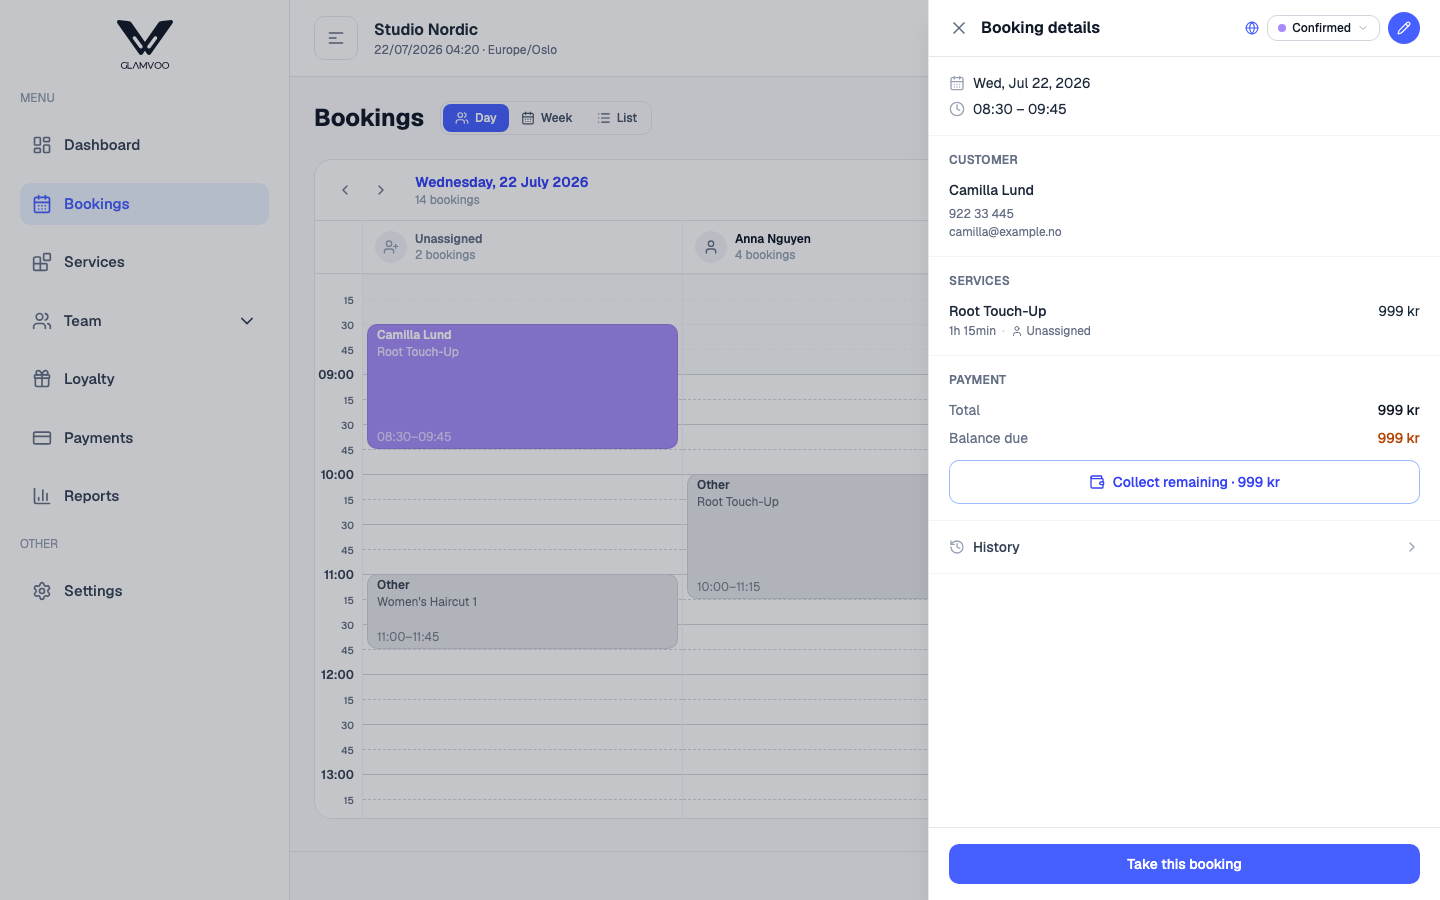
- To make changes, use the edit (pencil) button — you can change services, times, the team member, or notes.
- To sell something with the appointment, add it in the Products block. See Products & retail sales.
- To call off an appointment, cancel it from the same place.
Payments live in their own flow, not in the edit form. See Payments & deposits.
Booking statuses
Every booking has a status that tracks where it is in the visit. The status colour on the calendar tells you at a glance, and you move it forward yourself as things happen — the system never jumps ahead of you.
The normal flow
A typical appointment moves through these steps in order:
flowchart LR
    A[Pending] -->|Confirm| B[Confirmed]
    B -->|Customer arrives| C[Arrived]
    C -->|Start| D[In progress]
    D -->|Complete| E[Completed]
    B -. Cancel .-> X[Cancelled]
    B -. No show .-> Y[No show]
    C -. Cancel .-> X
    C -. No show .-> Y
    A -. Cancel .-> X
- Pending → the booking exists but isn't confirmed yet.
- Confirmed → it's locked in and expected.
- Arrived → the customer has checked in.
- In progress → the service is underway.
- Completed → all done.
Two things can happen instead of finishing: a booking can be Cancelled (called off) or marked No show (the customer didn't turn up).
What you do at each status
Open a booking and you'll see the actions that make sense for where it is right now:
| Status | What it means | What you can do next |
|---|---|---|
| Pending | New, not confirmed | Confirm · Cancel |
| Confirmed | Locked in, expected | Mark arrived · Start · Cancel · No show |
| Arrived | Customer checked in | Start · Cancel · No show |
| In progress | Service underway | Complete |
| Completed | Done | — (final) |
| Cancelled | Called off | — (final; use Create again to rebook) |
| No show | Didn't turn up | — (final) |
You'll often mark a customer Arrived when they walk in (or by scanning their QR code), then Complete when they leave.
A few things to know
- Walk-ins skip straight to In progress — the customer's already in the chair, so there's nothing to confirm or wait for.
- Auto-confirm: depending on your booking policy, online bookings can go straight to Confirmed and skip Pending.
- Completed, Cancelled and No show are final — a booking doesn't move on from them. To rebook a cancelled appointment, use Create again, which starts a fresh booking from the old one's details.
Status is separate from money. Marking a booking Completed does not charge anyone — the two are tracked independently. A completed booking might be fully paid, part-paid or unpaid, and you can still take payment or give a refund afterwards. How and when money actually moves is covered next, in Payments & deposits.
Next: Payments & deposits →